 Spring Boot 高级
# Spring Boot 高级
# 自动配置
# 组件添加
# @Configuration
配置类里面使用 @Bean 标注在方法上给容器注册组件,默认也是单实例的,配置类本身也是组件
proxyBeanMethods:代理 bean 的方法
- Full (proxyBeanMethods = true)、【保证每个 @Bean 方法被调用多少次返回的组件都是单实例的】
- Lite (proxyBeanMethods = false)【每个 @Bean 方法被调用多少次返回的组件都是新创建的】
组件依赖必须使用 Full 模式默认。其他默认是否 Lite 模式
@Configuration(proxyBeanMethods = false) //告诉SpringBoot这是一个配置类 == 配置文件
public class MyConfig {

    /**
     * Full:外部无论对配置类中的这个组件注册方法调用多少次获取的都是之前注册容器中的单实例对象
     * @return
     */
    @Bean //给容器中添加组件。以方法名作为组件的id。返回类型就是组件类型。返回的值,就是组件在容器中的实例
    public User user01(){
        User zhangsan = new User("zhangsan", 18);
        //user组件依赖了Pet组件
        zhangsan.setPet(tomcatPet());
        return zhangsan;
    }

    @Bean("tom")
    public Pet tomcatPet(){
        return new Pet("tomcat");
    }
}
2
3
4
5
6
7
8
9
10
11
12
13
14
15
16
17
18
19
20
# @Bean、@Component、@Controller、@Service、@Repository
根据它们的源码可以看到,Controller、Service、Repository 其本质就是 Component。
它存在的本质只是给开发者看的,对 Spring 而言它们就都是 Component。
@Controller 控制层类,@Service 业务层类,@Repository 持久层类,@Component 无法归类到前 3 种时就称为组件。
# @ComponentScan、@Import
@Import({User.class, DBHelper.class}) // 给容器中自动创建出这两个类型的组件、默认组件的名字就是全类名
@Configuration(proxyBeanMethods = false) //告诉SpringBoot这是一个配置类 == 配置文件
public class MyConfig {
}
2
3
4
# @Conditional
条件装配:满足 Conditional 指定的条件,则进行组件注入
@Configuration(proxyBeanMethods = false) //告诉SpringBoot这是一个配置类 == 配置文件
//@ConditionalOnBean(name = "tom")
@ConditionalOnMissingBean(name = "tom")
public class MyConfig {


    /**
     * Full:外部无论对配置类中的这个组件注册方法调用多少次获取的都是之前注册容器中的单实例对象
     * @return
     */

    @Bean //给容器中添加组件。以方法名作为组件的id。返回类型就是组件类型。返回的值,就是组件在容器中的实例
    public User user01(){
        User zhangsan = new User("zhangsan", 18);
        //user组件依赖了Pet组件
        zhangsan.setPet(tomcatPet());
        return zhangsan;
    }

    @Bean("tom22")
    public Pet tomcatPet(){
        return new Pet("tomcat");
    }
}

public static void main(String[] args) {
        //1、返回我们IOC容器
        ConfigurableApplicationContext run = SpringApplication.run(MainApplication.class, args);

        //2、查看容器里面的组件
        String[] names = run.getBeanDefinitionNames();
        for (String name : names) {
            System.out.println(name);
        }

        boolean tom = run.containsBean("tom");
        System.out.println("容器中Tom组件:"+tom);

        boolean user01 = run.containsBean("user01");
        System.out.println("容器中user01组件:"+user01);

        boolean tom22 = run.containsBean("tom22");
        System.out.println("容器中tom22组件:"+tom22);


    }
2
3
4
5
6
7
8
9
10
11
12
13
14
15
16
17
18
19
20
21
22
23
24
25
26
27
28
29
30
31
32
33
34
35
36
37
38
39
40
41
42
43
44
45
46
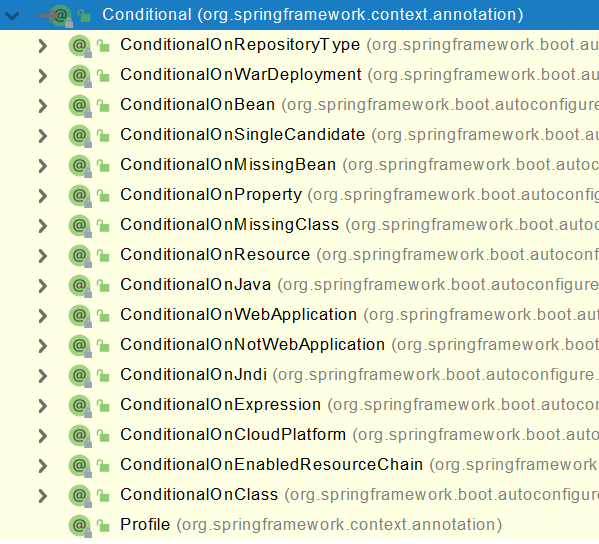
# 常用条件注解
- @ConditionalOnProperty 判断配置文件中是否有对应属性和值才初始化 Bean
- @ConditionalOnClass 判断环境中是否有对应的字节码文件才初始化 Bean
- @ConditionalOnMissingBean 判断环境中没有对应的 Bean 时才初始化 Bean
- @ConditionalOnBean 判断容器中有指定组件时才注册该被标注的组件
@Bean
//当application配置文件中有此键值对时才创建此bean
@ConditionalOnProperty(name = "name",havingValue = "zhangsan")
public User user2(){
    return new User();
}
2
3
4
5
6
@ConditionalOnBean(name = "tomcat")
@Bean  // 给容器注册添加组件 用bean声明   返回的值,就是组件在容器中的实例
public User user01() {
    User zhangsan = new User("zhangsan",18);
    zhangsan.setPet(tomcatpet());
    return zhangsan;
}
2
3
4
5
6
7
# Condition 接口
Condition 是 spring 4.0 增加的条件判断功能 通个这个功能可以实现选择性的创建 Bean 操作
启动类返回 IOC 容器 获取 bean 对象
        //启动springboot的应用 返回spring的IOC容器
        ConfigurableApplicationContext context = SpringApplication.run(SpringbootProfilesApplication.class, args);

        //获取bean
        Object redisTemplate = context.getBean("redisTemplate");
        System.out.println(redisTemplate);
2
3
4
5
6
创建一个类实现 Condition 接口 实现 matches 方法 返回一个布尔值 true 为允许创建 bean false 为不允许
import org.springframework.context.annotation.Condition;
import org.springframework.context.annotation.ConditionContext;
import org.springframework.core.type.AnnotatedTypeMetadata;

public class ClassCondition implements Condition {
    @Override
    public boolean matches(ConditionContext context, AnnotatedTypeMetadata metadata) {


        try {
            //获取指定的class 是否加载 没有则不允许创建新的bean
            Class<?> cls = Class.forName("redis.clients.jedis.Jedis");
        } catch (ClassNotFoundException e) {
            return false;
        }


        return true;
    }
}
2
3
4
5
6
7
8
9
10
11
12
13
14
15
16
17
18
19
20
使用注解 @Conditional
@Configuration
public class UserConfig {

    @Bean
    //如果为true则创建该bean
    @Conditional(ClassCondition.class)
    public User user(){
        return new User();
    }
}
2
3
4
5
6
7
8
9
10
# 自定义 @Conditional 注解
创建注解
package com.itheima.springbootprofiles.condtion;


import org.springframework.context.annotation.Conditional;

import java.lang.annotation.*;

@Target({ElementType.TYPE, ElementType.METHOD})
@Retention(RetentionPolicy.RUNTIME)
@Documented
@Conditional(ClassCondition.class)
public @interface ConditionOnClass {
    String[] value();
}
2
3
4
5
6
7
8
9
10
11
12
13
14
15
创建一个类实现 Condition 接口 实现 matches 方法 返回一个布尔值 true 为允许创建 bean false 为不允许
package com.itheima.springbootprofiles.condtion;

import org.springframework.context.annotation.Condition;
import org.springframework.context.annotation.ConditionContext;
import org.springframework.core.type.AnnotatedTypeMetadata;

import java.util.Map;

public class ClassCondition implements Condition {
    /**
     *
     * @param context 上下文对象 用于获取环境 ioc容器 classloader对象
     * @param metadata 注解元对象 可以用于获取注解定义的属性值
     * @return
     */
    @Override
    public boolean matches(ConditionContext context, AnnotatedTypeMetadata metadata) {


        Map<String, Object> map = metadata.getAnnotationAttributes(ConditionOnClass.class.getName());  //获取注解中的元数据
        String[] value = (String[]) map.get("value");  //获取value中值

        try {
            //获取指定的class 是否加载 没有则不允许创建新的bean
            for (String classNmae : value) {
                Class<?> cls = Class.forName(classNmae);
            }
        } catch (ClassNotFoundException e) {
            return false;
        }


        return true;
    }
}
2
3
4
5
6
7
8
9
10
11
12
13
14
15
16
17
18
19
20
21
22
23
24
25
26
27
28
29
30
31
32
33
34
35
36
使用注解
@Configuration
public class UserConfig {

    @Bean
//    @Conditional(ClassCondition.class)
    @ConditionOnClass("com.alibaba.fastjson.Json")
    public User user(){
        return new User();
    }
}
2
3
4
5
6
7
8
9
10
# 原生配置文件引入
使用 @ImportResource 注解可以引入原生配置文件,下面的代码展示的是原来 Spring 用 xml 文件的方式配置 bean 的方式
<?xml version="1.0" encoding="UTF-8"?>
<beans xmlns="http://www.springframework.org/schema/beans"
       xmlns:xsi="http://www.w3.org/2001/XMLSchema-instance"
       xmlns:context="http://www.springframework.org/schema/context"
       xsi:schemaLocation="http://www.springframework.org/schema/beans http://www.springframework.org/schema/beans/spring-beans.xsd http://www.springframework.org/schema/context https://www.springframework.org/schema/context/spring-context.xsd">

    <bean id="haha" class="com.atguigu.boot.bean.User">
        <property name="name" value="zhangsan"></property>
        <property name="age" value="18"></property>
    </bean>

    <bean id="hehe" class="com.atguigu.boot.bean.Pet">
        <property name="name" value="tomcat"></property>
    </bean>
</beans>
2
3
4
5
6
7
8
9
10
11
12
13
14
15
读取
@ImportResource("classpath:beans.xml")
public class MyConfig {}

public static void main(String[] args) {
        //1、返回我们IOC容器
        ConfigurableApplicationContext run = SpringApplication.run(MainApplication.class, args);

        boolean haha = run.containsBean("haha");
        boolean hehe = run.containsBean("hehe");
        System.out.println("haha:"+haha);//true
        System.out.println("hehe:"+hehe);//true
    }
2
3
4
5
6
7
8
9
10
11
12
13
14
# 配置绑定
如何使用 Java 读取到 properties 文件中的内容,并且把它封装到 JavaBean 中,以供随时使用;
public class getProperties {
     public static void main(String[] args) throws FileNotFoundException, IOException {
         Properties pps = new Properties();
         pps.load(new FileInputStream("a.properties"));
         Enumeration enum1 = pps.propertyNames();//得到配置文件的名字
         while(enum1.hasMoreElements()) {
             String strKey = (String) enum1.nextElement();
             String strValue = pps.getProperty(strKey);
             System.out.println(strKey + "=" + strValue);
             //封装到JavaBean。
         }
     }
 }
2
3
4
5
6
7
8
9
10
11
12
13
# @ConfigurationProperties
/**
 * 只有在容器中的组件,才会拥有SpringBoot提供的强大功能
 */
@Component
@ConfigurationProperties(prefix = "mycar")
public class Car {

    private String brand;
    private Integer price;

    public String getBrand() {
        return brand;
    }

    public void setBrand(String brand) {
        this.brand = brand;
    }

    public Integer getPrice() {
        return price;
    }

    public void setPrice(Integer price) {
        this.price = price;
    }

    @Override
    public String toString() {
        return "Car{" +
                "brand='" + brand + '\'' +
                ", price=" + price +
                '}';
    }
}
2
3
4
5
6
7
8
9
10
11
12
13
14
15
16
17
18
19
20
21
22
23
24
25
26
27
28
29
30
31
32
33
34
# @EnableConfigurationProperties + @ConfigurationProperties
一般使用这种方式与 @EnableConfigurationProperties 搭配使用
@EnableConfigurationProperties(Car.class) // 开启 Car 的属性配置并自动注入到容器中
public class MyConfiguration {

@ConfigurationProperties(prefix = "mycar")
public class Car {
}
2
3
4
5
6
# @Component + @ConfigurationProperties
@EnableConfigurationProperties(Car.class)
//1、开启Car配置绑定功能
//2、把这个Car这个组件自动注册到容器中
public class MyConfig {
}
2
3
4
5
# 自动配置原理入门
我们看看 @SpringBootApplication 包含那些注解
@SpringBootConfiguration
@EnableAutoConfiguration
@ComponentScan(excludeFilters = { @Filter(type = FilterType.CUSTOM, classes = TypeExcludeFilter.class),
		@Filter(type = FilterType.CUSTOM, classes = AutoConfigurationExcludeFilter.class) })
public @interface SpringBootApplication{}
2
3
4
5
@SpringBootConfiguration:@Configuration。代表当前是一个配置类@ComponentScan:指定扫描哪些,Spring 注解;@EnableAutoConfiguration:注解内部使用@Import(AutoConfigurationImporttSelector.class)来加载配置类
# @EnableAutoConfiguration
@AutoConfigurationPackage
@Import(AutoConfigurationImportSelector.class)
public @interface EnableAutoConfiguration {}
2
3
# @AutoConfigurationPackage
@AutoConfigurationPackage 注解是指定了默认的包规则,即在该包下的组件才可以被 Springboot 扫描后自动装配进 IOC 容器中。
@Import(AutoConfigurationPackages.Registrar.class)  //给容器中导入一个组件
public @interface AutoConfigurationPackage {}

//利用Registrar给容器中导入一系列组件
//将指定的一个包下的所有组件导入进来?MainApplication 所在包下。
2
3
4
5
# @Import(AutoConfigurationImportSelector.class)
利用
getAutoConfigurationEntry(annotationMetadata);给容器中批量导入一些组件调用
List<String> configurations = getCandidateConfigurations(annotationMetadata, attributes)获取到所有需要导入到容器中的配置类利用工厂加载
Map<String, List<String>> loadSpringFactories(@Nullable ClassLoader classLoader);得到所有的组件从
META-INF/spring.factories位置来加载一个文件。默认扫描我们当前系统里面所有META-INF/spring.factories位置的文件spring-boot-autoconfigure-2.3.4.RELEASE.jar 包里面也有
META-INF/spring.factories
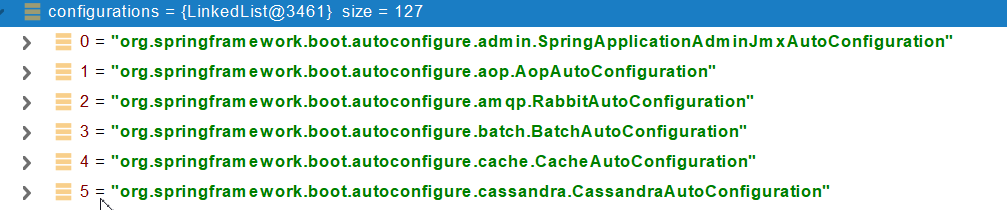
文件里面写死了 spring-boot 一启动就要给容器中加载的所有配置类
spring-boot-autoconfigure-2.3.4.RELEASE.jar/META-INF/spring.factories
# Auto Configure
org.springframework.boot.autoconfigure.EnableAutoConfiguration=\
org.springframework.boot.autoconfigure.admin.SpringApplicationAdminJmxAutoConfiguration,\
org.springframework.boot.autoconfigure.aop.AopAutoConfiguration,\
org.springframework.boot.autoconfigure.amqp.RabbitAutoConfiguration,\
org.springframework.boot.autoconfigure.batch.BatchAutoConfiguration,\
org.springframework.boot.autoconfigure.cache.CacheAutoConfiguration,\
org.springframework.boot.autoconfigure.cassandra.CassandraAutoConfiguration,\
org.springframework.boot.autoconfigure.context.ConfigurationPropertiesAutoConfiguration,\
org.springframework.boot.autoconfigure.context.LifecycleAutoConfiguration,\
org.springframework.boot.autoconfigure.context.MessageSourceAutoConfiguration,\
org.springframework.boot.autoconfigure.context.PropertyPlaceholderAutoConfiguration,\
org.springframework.boot.autoconfigure.couchbase.CouchbaseAutoConfiguration,\
org.springframework.boot.autoconfigure.dao.PersistenceExceptionTranslationAutoConfiguration,\
org.springframework.boot.autoconfigure.data.cassandra.CassandraDataAutoConfiguration,\
org.springframework.boot.autoconfigure.data.cassandra.CassandraReactiveDataAutoConfiguration,\
org.springframework.boot.autoconfigure.data.cassandra.CassandraReactiveRepositoriesAutoConfiguration,\
org.springframework.boot.autoconfigure.data.cassandra.CassandraRepositoriesAutoConfiguration,\
org.springframework.boot.autoconfigure.data.couchbase.CouchbaseDataAutoConfiguration,\
org.springframework.boot.autoconfigure.data.couchbase.CouchbaseReactiveDataAutoConfiguration,\
org.springframework.boot.autoconfigure.data.couchbase.CouchbaseReactiveRepositoriesAutoConfiguration,\
org.springframework.boot.autoconfigure.data.couchbase.CouchbaseRepositoriesAutoConfiguration,\
org.springframework.boot.autoconfigure.data.elasticsearch.ElasticsearchDataAutoConfiguration,\
org.springframework.boot.autoconfigure.data.elasticsearch.ElasticsearchRepositoriesAutoConfiguration,\
org.springframework.boot.autoconfigure.data.elasticsearch.ReactiveElasticsearchRepositoriesAutoConfiguration,\
org.springframework.boot.autoconfigure.data.elasticsearch.ReactiveElasticsearchRestClientAutoConfiguration,\
org.springframework.boot.autoconfigure.data.jdbc.JdbcRepositoriesAutoConfiguration,\
org.springframework.boot.autoconfigure.data.jpa.JpaRepositoriesAutoConfiguration,\
org.springframework.boot.autoconfigure.data.ldap.LdapRepositoriesAutoConfiguration,\
org.springframework.boot.autoconfigure.data.mongo.MongoDataAutoConfiguration,\
org.springframework.boot.autoconfigure.data.mongo.MongoReactiveDataAutoConfiguration,\
org.springframework.boot.autoconfigure.data.mongo.MongoReactiveRepositoriesAutoConfiguration,\
org.springframework.boot.autoconfigure.data.mongo.MongoRepositoriesAutoConfiguration,\
org.springframework.boot.autoconfigure.data.neo4j.Neo4jDataAutoConfiguration,\
org.springframework.boot.autoconfigure.data.neo4j.Neo4jRepositoriesAutoConfiguration,\
org.springframework.boot.autoconfigure.data.solr.SolrRepositoriesAutoConfiguration,\
org.springframework.boot.autoconfigure.data.r2dbc.R2dbcDataAutoConfiguration,\
org.springframework.boot.autoconfigure.data.r2dbc.R2dbcRepositoriesAutoConfiguration,\
org.springframework.boot.autoconfigure.data.r2dbc.R2dbcTransactionManagerAutoConfiguration,\
org.springframework.boot.autoconfigure.data.redis.RedisAutoConfiguration,\
org.springframework.boot.autoconfigure.data.redis.RedisReactiveAutoConfiguration,\
org.springframework.boot.autoconfigure.data.redis.RedisRepositoriesAutoConfiguration,\
org.springframework.boot.autoconfigure.data.rest.RepositoryRestMvcAutoConfiguration,\
org.springframework.boot.autoconfigure.data.web.SpringDataWebAutoConfiguration,\
org.springframework.boot.autoconfigure.elasticsearch.ElasticsearchRestClientAutoConfiguration,\
org.springframework.boot.autoconfigure.flyway.FlywayAutoConfiguration,\
org.springframework.boot.autoconfigure.freemarker.FreeMarkerAutoConfiguration,\
org.springframework.boot.autoconfigure.groovy.template.GroovyTemplateAutoConfiguration,\
org.springframework.boot.autoconfigure.gson.GsonAutoConfiguration,\
org.springframework.boot.autoconfigure.h2.H2ConsoleAutoConfiguration,\
org.springframework.boot.autoconfigure.hateoas.HypermediaAutoConfiguration,\
org.springframework.boot.autoconfigure.hazelcast.HazelcastAutoConfiguration,\
org.springframework.boot.autoconfigure.hazelcast.HazelcastJpaDependencyAutoConfiguration,\
org.springframework.boot.autoconfigure.http.HttpMessageConvertersAutoConfiguration,\
org.springframework.boot.autoconfigure.http.codec.CodecsAutoConfiguration,\
org.springframework.boot.autoconfigure.influx.InfluxDbAutoConfiguration,\
org.springframework.boot.autoconfigure.info.ProjectInfoAutoConfiguration,\
org.springframework.boot.autoconfigure.integration.IntegrationAutoConfiguration,\
org.springframework.boot.autoconfigure.jackson.JacksonAutoConfiguration,\
org.springframework.boot.autoconfigure.jdbc.DataSourceAutoConfiguration,\
org.springframework.boot.autoconfigure.jdbc.JdbcTemplateAutoConfiguration,\
org.springframework.boot.autoconfigure.jdbc.JndiDataSourceAutoConfiguration,\
org.springframework.boot.autoconfigure.jdbc.XADataSourceAutoConfiguration,\
org.springframework.boot.autoconfigure.jdbc.DataSourceTransactionManagerAutoConfiguration,\
org.springframework.boot.autoconfigure.jms.JmsAutoConfiguration,\
org.springframework.boot.autoconfigure.jmx.JmxAutoConfiguration,\
org.springframework.boot.autoconfigure.jms.JndiConnectionFactoryAutoConfiguration,\
org.springframework.boot.autoconfigure.jms.activemq.ActiveMQAutoConfiguration,\
org.springframework.boot.autoconfigure.jms.artemis.ArtemisAutoConfiguration,\
org.springframework.boot.autoconfigure.jersey.JerseyAutoConfiguration,\
org.springframework.boot.autoconfigure.jooq.JooqAutoConfiguration,\
org.springframework.boot.autoconfigure.jsonb.JsonbAutoConfiguration,\
org.springframework.boot.autoconfigure.kafka.KafkaAutoConfiguration,\
org.springframework.boot.autoconfigure.availability.ApplicationAvailabilityAutoConfiguration,\
org.springframework.boot.autoconfigure.ldap.embedded.EmbeddedLdapAutoConfiguration,\
org.springframework.boot.autoconfigure.ldap.LdapAutoConfiguration,\
org.springframework.boot.autoconfigure.liquibase.LiquibaseAutoConfiguration,\
org.springframework.boot.autoconfigure.mail.MailSenderAutoConfiguration,\
org.springframework.boot.autoconfigure.mail.MailSenderValidatorAutoConfiguration,\
org.springframework.boot.autoconfigure.mongo.embedded.EmbeddedMongoAutoConfiguration,\
org.springframework.boot.autoconfigure.mongo.MongoAutoConfiguration,\
org.springframework.boot.autoconfigure.mongo.MongoReactiveAutoConfiguration,\
org.springframework.boot.autoconfigure.mustache.MustacheAutoConfiguration,\
org.springframework.boot.autoconfigure.orm.jpa.HibernateJpaAutoConfiguration,\
org.springframework.boot.autoconfigure.quartz.QuartzAutoConfiguration,\
org.springframework.boot.autoconfigure.r2dbc.R2dbcAutoConfiguration,\
org.springframework.boot.autoconfigure.rsocket.RSocketMessagingAutoConfiguration,\
org.springframework.boot.autoconfigure.rsocket.RSocketRequesterAutoConfiguration,\
org.springframework.boot.autoconfigure.rsocket.RSocketServerAutoConfiguration,\
org.springframework.boot.autoconfigure.rsocket.RSocketStrategiesAutoConfiguration,\
org.springframework.boot.autoconfigure.security.servlet.SecurityAutoConfiguration,\
org.springframework.boot.autoconfigure.security.servlet.UserDetailsServiceAutoConfiguration,\
org.springframework.boot.autoconfigure.security.servlet.SecurityFilterAutoConfiguration,\
org.springframework.boot.autoconfigure.security.reactive.ReactiveSecurityAutoConfiguration,\
org.springframework.boot.autoconfigure.security.reactive.ReactiveUserDetailsServiceAutoConfiguration,\
org.springframework.boot.autoconfigure.security.rsocket.RSocketSecurityAutoConfiguration,\
org.springframework.boot.autoconfigure.security.saml2.Saml2RelyingPartyAutoConfiguration,\
org.springframework.boot.autoconfigure.sendgrid.SendGridAutoConfiguration,\
org.springframework.boot.autoconfigure.session.SessionAutoConfiguration,\
org.springframework.boot.autoconfigure.security.oauth2.client.servlet.OAuth2ClientAutoConfiguration,\
org.springframework.boot.autoconfigure.security.oauth2.client.reactive.ReactiveOAuth2ClientAutoConfiguration,\
org.springframework.boot.autoconfigure.security.oauth2.resource.servlet.OAuth2ResourceServerAutoConfiguration,\
org.springframework.boot.autoconfigure.security.oauth2.resource.reactive.ReactiveOAuth2ResourceServerAutoConfiguration,\
org.springframework.boot.autoconfigure.solr.SolrAutoConfiguration,\
org.springframework.boot.autoconfigure.task.TaskExecutionAutoConfiguration,\
org.springframework.boot.autoconfigure.task.TaskSchedulingAutoConfiguration,\
org.springframework.boot.autoconfigure.thymeleaf.ThymeleafAutoConfiguration,\
org.springframework.boot.autoconfigure.transaction.TransactionAutoConfiguration,\
org.springframework.boot.autoconfigure.transaction.jta.JtaAutoConfiguration,\
org.springframework.boot.autoconfigure.validation.ValidationAutoConfiguration,\
org.springframework.boot.autoconfigure.web.client.RestTemplateAutoConfiguration,\
org.springframework.boot.autoconfigure.web.embedded.EmbeddedWebServerFactoryCustomizerAutoConfiguration,\
org.springframework.boot.autoconfigure.web.reactive.HttpHandlerAutoConfiguration,\
org.springframework.boot.autoconfigure.web.reactive.ReactiveWebServerFactoryAutoConfiguration,\
org.springframework.boot.autoconfigure.web.reactive.WebFluxAutoConfiguration,\
org.springframework.boot.autoconfigure.web.reactive.error.ErrorWebFluxAutoConfiguration,\
org.springframework.boot.autoconfigure.web.reactive.function.client.ClientHttpConnectorAutoConfiguration,\
org.springframework.boot.autoconfigure.web.reactive.function.client.WebClientAutoConfiguration,\
org.springframework.boot.autoconfigure.web.servlet.DispatcherServletAutoConfiguration,\
org.springframework.boot.autoconfigure.web.servlet.ServletWebServerFactoryAutoConfiguration,\
org.springframework.boot.autoconfigure.web.servlet.error.ErrorMvcAutoConfiguration,\
org.springframework.boot.autoconfigure.web.servlet.HttpEncodingAutoConfiguration,\
org.springframework.boot.autoconfigure.web.servlet.MultipartAutoConfiguration,\
org.springframework.boot.autoconfigure.web.servlet.WebMvcAutoConfiguration,\
org.springframework.boot.autoconfigure.websocket.reactive.WebSocketReactiveAutoConfiguration,\
org.springframework.boot.autoconfigure.websocket.servlet.WebSocketServletAutoConfiguration,\
org.springframework.boot.autoconfigure.websocket.servlet.WebSocketMessagingAutoConfiguration,\
org.springframework.boot.autoconfigure.webservices.WebServicesAutoConfiguration,\
org.springframework.boot.autoconfigure.webservices.client.WebServiceTemplateAutoConfiguration
2
3
4
5
6
7
8
9
10
11
12
13
14
15
16
17
18
19
20
21
22
23
24
25
26
27
28
29
30
31
32
33
34
35
36
37
38
39
40
41
42
43
44
45
46
47
48
49
50
51
52
53
54
55
56
57
58
59
60
61
62
63
64
65
66
67
68
69
70
71
72
73
74
75
76
77
78
79
80
81
82
83
84
85
86
87
88
89
90
91
92
93
94
95
96
97
98
99
100
101
102
103
104
105
106
107
108
109
110
111
112
113
114
115
116
117
118
119
120
121
122
123
124
125
126
127
128
129
# 按需开启自动配置项
虽然我们 127 个场景的所有自动配置启动的时候默认全部加载。xxxxAutoConfiguration 但是按照条件装配规则(@Conditional),最终会按需配置。
# 修改默认配置
@Bean
@ConditionalOnBean(MultipartResolver.class)  //容器中有这个类型组件
@ConditionalOnMissingBean(name = DispatcherServlet.MULTIPART_RESOLVER_BEAN_NAME) //容器中没有这个名字 multipartResolver 的组件
public MultipartResolver multipartResolver(MultipartResolver resolver) {
    //给@Bean标注的方法传入了对象参数,这个参数的值就会从容器中找。
    //SpringMVC multipartResolver。防止有些用户配置的文件上传解析器不符合规范
    // Detect if the user has created a MultipartResolver but named it incorrectly
    return resolver;
}
// 给容器中加入了文件上传解析器 MultipartResolver;
2
3
4
5
6
7
8
9
10
SpringBoot 默认会在底层配好所有的组件。但是如果用户自己配置了以用户的优先
@Bean
@ConditionalOnMissingBean
public CharacterEncodingFilter characterEncodingFilter() {
}
2
3
4
# 切换内置 web 服务器
SpringBoot 的 web 环境默认为 tomcat 作为内置服务器,Springboot 提供了 4 种内置服务器让我们选择
排除 tomcat 引入 jetty 依赖
        <dependency>
            <groupId>org.springframework.boot</groupId>
            <artifactId>spring-boot-starter-web</artifactId>
            <!--            排除tomcat-->
            <exclusions>
                <exclusion>
                    <groupId>org.springframework.boot</groupId>
                    <artifactId>spring-boot-starter-tomcat</artifactId>
                </exclusion>
            </exclusions>
        </dependency>
        <!--        引入jetty的依赖-->
        <dependency>
            <groupId>org.springframework.boot</groupId>
            <artifactId>spring-boot-starter-jetty</artifactId>
        </dependency>
1
2
3
4
5
6
7
8
9
10
11
12
13
14
15
16
# @Enable* 注解
SpringBoot 中提供了很多 Enable 开头的注解,这些注解都是用于动态启用某些功能的,而底层原理是使用了 @Import 注解导入一些配置类,实现 Bean 的动态加载
# 第三方包导入
在项目或者 POM 中添加坐标
Springboot 并不会加载到我们自己手动导入的第三方包
- 使用 @ComponentScan ("引用路径") 重新定义扫描目录 SpringBoot 默认为启动类的根路径下 Bean
- 使用 @Import (字节码) 导入第三方 jar 包
- 自定义注解 实现 @Import 并继承其之前的注解 简化我们书写
# @Import 注解
@Enable * 底层依赖于 @Import 注解导入一些类,使用 @Import 导入的类会被 Spring 加载到 IOC 容器中,而 @Import 提供 4 种用法
导入 Bean
导入配置类
导入 ImportSelector 实现类 一般用于加载配置文件中的类
public class MyImportSelector implements ImportSelector {
    //实现selectImports方法 需要一个元数据
    @Override
    public String[] selectImports(AnnotationMetadata importingClassMetadata) {
        return new String[]{"com.itheima.domain.user"};
    }
}

//使用@Import导入实现类
@Import(MyImportSelector.class)
1
2
3
4
5
6
7
8
9
10导入 ImportBeanDefinitionRegistrar 实现类
public class MyImportBeanDefinitionRegistrar implements ImportBeanDefinitionRegistrar {
    @Override
    public void registerBeanDefinitions(AnnotationMetadata importingClassMetadata, BeanDefinitionRegistry registry) {
        //Bean对象
        AbstractBeanDefinition beanDefinition = BeanDefinitionBuilder.rootBeanDefinition(User.class).getBeanDefinition();
        //创建bean的名称 以及需要一个bean对象
        registry.registerBeanDefinition("user",beanDefinition);
    }
}


//使用@Import导入实现类
@Import(MyImportBeanDefinitionRegistrar.class)
1
2
3
4
5
6
7
8
9
10
11
12
13
# @EnableAutoConfiguration
- @EnableAutoConfiguration 注解内部使用 @Import (AutoConfigurationImporttSelector.class) 来加载配置类
- 配置文件位置: META-INF/spring.factories 该配置文件中定义了大量的配置类 当 SpringBoot 应用启动时,会自动加载这些配置类 初始化 Bean
- 并不是所有 Bean 都会被初始化 在配置类中使用 Condition 来加载满足条件的 Bean
# 自定义自动配置
配置 redis 配置类
package com.itheima.redisspringbootautoconfigure.redis.config;

import org.springframework.boot.context.properties.ConfigurationProperties;

@ConfigurationProperties(prefix = "redis")
public class RedisProperties {
    private String host="localhost";
    private int port =6379;

    public String getHost() {
        return host;
    }

    public void setHost(String host) {
        this.host = host;
    }

    public int getPort() {
        return port;
    }

    public void setPort(int port) {
        this.port = port;
    }
}
2
3
4
5
6
7
8
9
10
11
12
13
14
15
16
17
18
19
20
21
22
23
24
25
26
自动配置类
package com.itheima.redisspringbootautoconfigure.redis.config;

import org.springframework.boot.context.properties.EnableConfigurationProperties;
import org.springframework.context.annotation.Bean;
import org.springframework.context.annotation.Configuration;
import redis.clients.jedis.Jedis;

@Configuration
@EnableConfigurationProperties(RedisProperties.class)
@ConditionalOnClass(Jedis.class)
public class RedisAutoConfiguration {

    @Bean
    @ConditionalOnMissingBean(name = "jedis")
    public Jedis jedis(RedisProperties redisProperties) {
        return new Jedis(redisProperties.getHost(), redisProperties.getPort());
    }
}
2
3
4
5
6
7
8
9
10
11
12
13
14
15
16
17
18
19
在 resource 下创建 META-INF 目录 创建 spring.factories 文件
org.springframework.boot.autoconfigure.EnableAutoConfiguration=\
 com.itheima.redisspringbootautoconfigure.redis.config.RedisAutoConfiguration
2
- 使用 在项目 pom 中引入自定义自动配置的项目坐标
启动时自动配置
# 监听机制
SpringBoot 的监听机制,其实是对 java 提供的事件监听机制的封装
Java 中的事件监听机制定义了以下几个角色:
- 事件: Event, 继承 java.util.EventObject 类的对象
- 事件源: Source , 任意对象 Object
- 监听器: Listener 实现 java.util.EventListener 接口的对象
SpringBoot 在项目启动时,会对几个监听器进行回调,我们可以实现这些监听器接口,在项目启动时完成一些操作
ApplicationContextInitializer 项目图标加载后监听
package com.itheima.springbootinit.listener;

import org.springframework.context.ApplicationContextInitializer;
import org.springframework.context.ConfigurableApplicationContext;
import org.springframework.stereotype.Component;

@Component
public class MyApplicationContextInitializer implements ApplicationContextInitializer {
    @Override
    public void initialize(ConfigurableApplicationContext applicationContext) {
        System.out.println("ApplicationContextInitializer...initialize");
    }
}
1
2
3
4
5
6
7
8
9
10
11
12
13
14并且配置 resource 下的 META-INF 的 spring.factories 配置
org.springframework.context.ApplicationContextInitializer=com.itheima.springbootinit.listener.MyApplicationContextInitializer1SpringApplicationRunListener 生命周期监听
package com.itheima.springbootinit.listener;

import org.springframework.boot.ConfigurableBootstrapContext;
import org.springframework.boot.SpringApplication;
import org.springframework.boot.SpringApplicationRunListener;
import org.springframework.context.ConfigurableApplicationContext;
import org.springframework.core.env.ConfigurableEnvironment;
import org.springframework.stereotype.Component;


public class MySpringApplicationRunListener implements SpringApplicationRunListener {
    public MySpringApplicationRunListener(SpringApplication application, String[] args) {
    }

    @Override
    public void starting(ConfigurableBootstrapContext bootstrapContext) {
        System.out.println("starting...项目启动中");
    }

    @Override
    public void environmentPrepared(ConfigurableBootstrapContext bootstrapContext, ConfigurableEnvironment environment) {
        System.out.println("environmentPrepared...环境对象开始准备");

    }

    @Override
    public void contextPrepared(ConfigurableApplicationContext context) {
        System.out.println("contextPrepared...上下文对象开始准备");

    }

    @Override
    public void contextLoaded(ConfigurableApplicationContext context) {
        System.out.println("contextLoaded...上下文对象开始加载");
    }

    @Override
    public void started(ConfigurableApplicationContext context) {
        System.out.println("started...上下文对象加载完成");

    }

    @Override
    public void running(ConfigurableApplicationContext context) {
        System.out.println("running...项目启动完成,开始运行");

    }

    @Override
    public void failed(ConfigurableApplicationContext context, Throwable exception) {
        System.out.println("failed...项目启动失败");

    }
}
1
2
3
4
5
6
7
8
9
10
11
12
13
14
15
16
17
18
19
20
21
22
23
24
25
26
27
28
29
30
31
32
33
34
35
36
37
38
39
40
41
42
43
44
45
46
47
48
49
50
51
52
53
54
55并且配置 resource 下的 META-INF 的 spring.factories 配置
org.springframework.boot.SpringApplicationRunListener=com.itheima.springbootinit.listener.MySpringApplicationRunListener1CommandLineRunner
package com.itheima.springbootinit.listener;

import org.springframework.boot.CommandLineRunner;
import org.springframework.stereotype.Component;

import java.util.Arrays;

@Component
public class MyCommandLineRunner implements CommandLineRunner {
    @Override
    public void run(String... args) throws Exception {
        System.out.println("CommandLineRunner...run");
        System.out.println(Arrays.toString(args));  //java运行传递的参数
    }
}
1
2
3
4
5
6
7
8
9
10
11
12
13
14
15
16ApplicationRunner
package com.itheima.springbootinit.listener;

import org.springframework.boot.ApplicationArguments;
import org.springframework.boot.ApplicationRunner;
import org.springframework.stereotype.Component;

import java.util.Arrays;

@Component
public class MyApplicationRunner implements ApplicationRunner {
    @Override
    public void run(ApplicationArguments args) throws Exception {
        System.out.println("ApplicationRunner...run");
        System.out.println(Arrays.toString(args.getSourceArgs())); //java运行传递的参数
    }
}
1
2
3
4
5
6
7
8
9
10
11
12
13
14
15
16
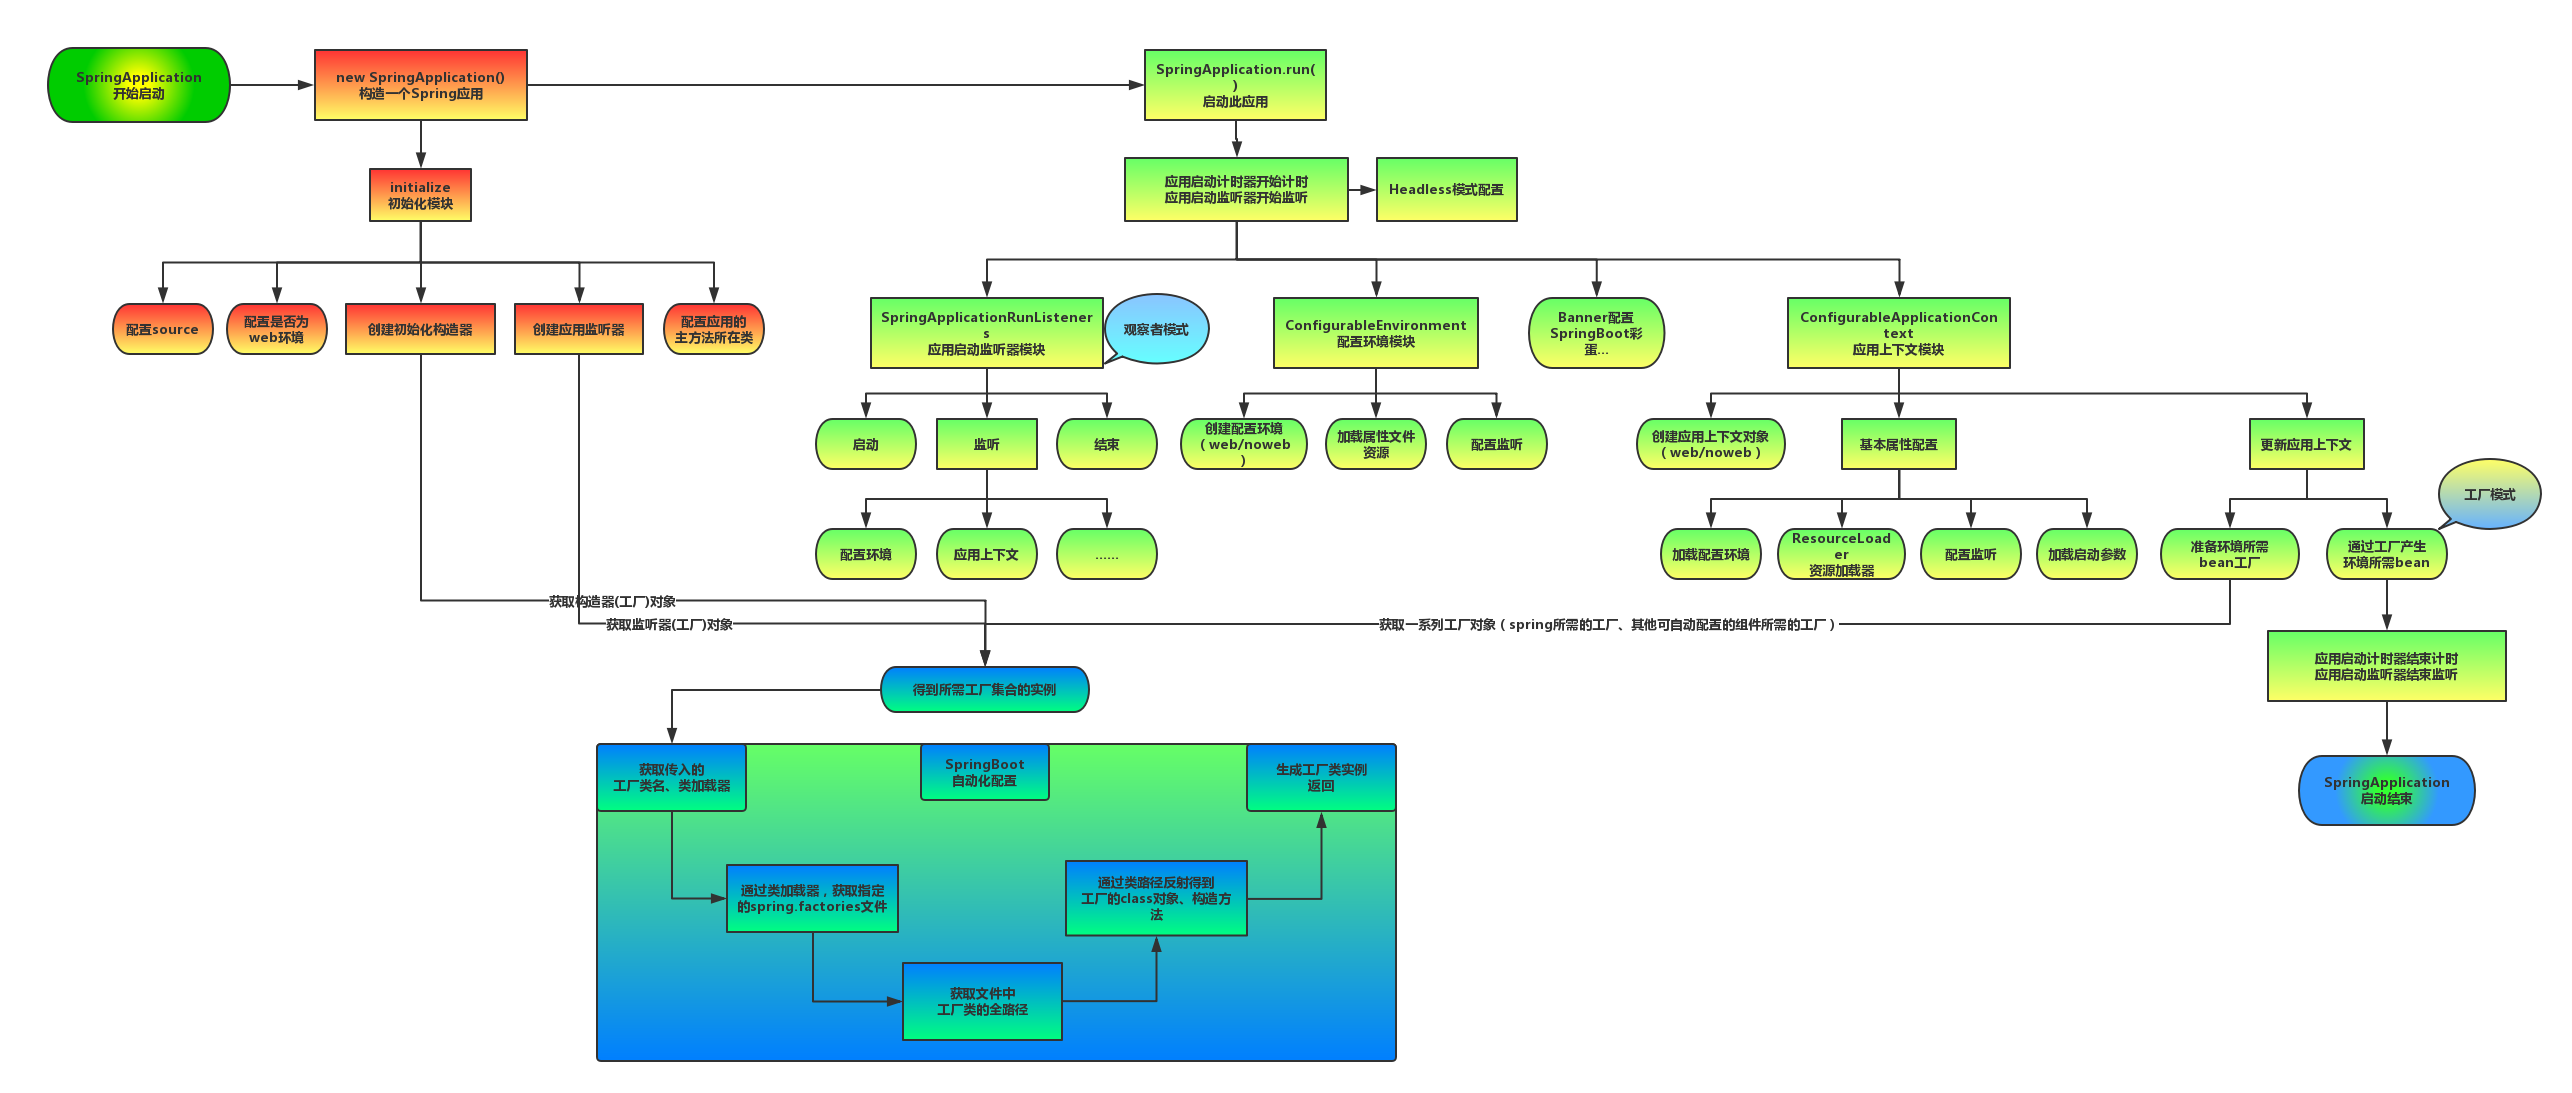
# 启动流程
# 监控
SpringBoot 自带监控功能 Actuator, 可以帮助实现对程序内部运行情况监控,比如监控状况 Bean 加载情况 配置属性 日志信息
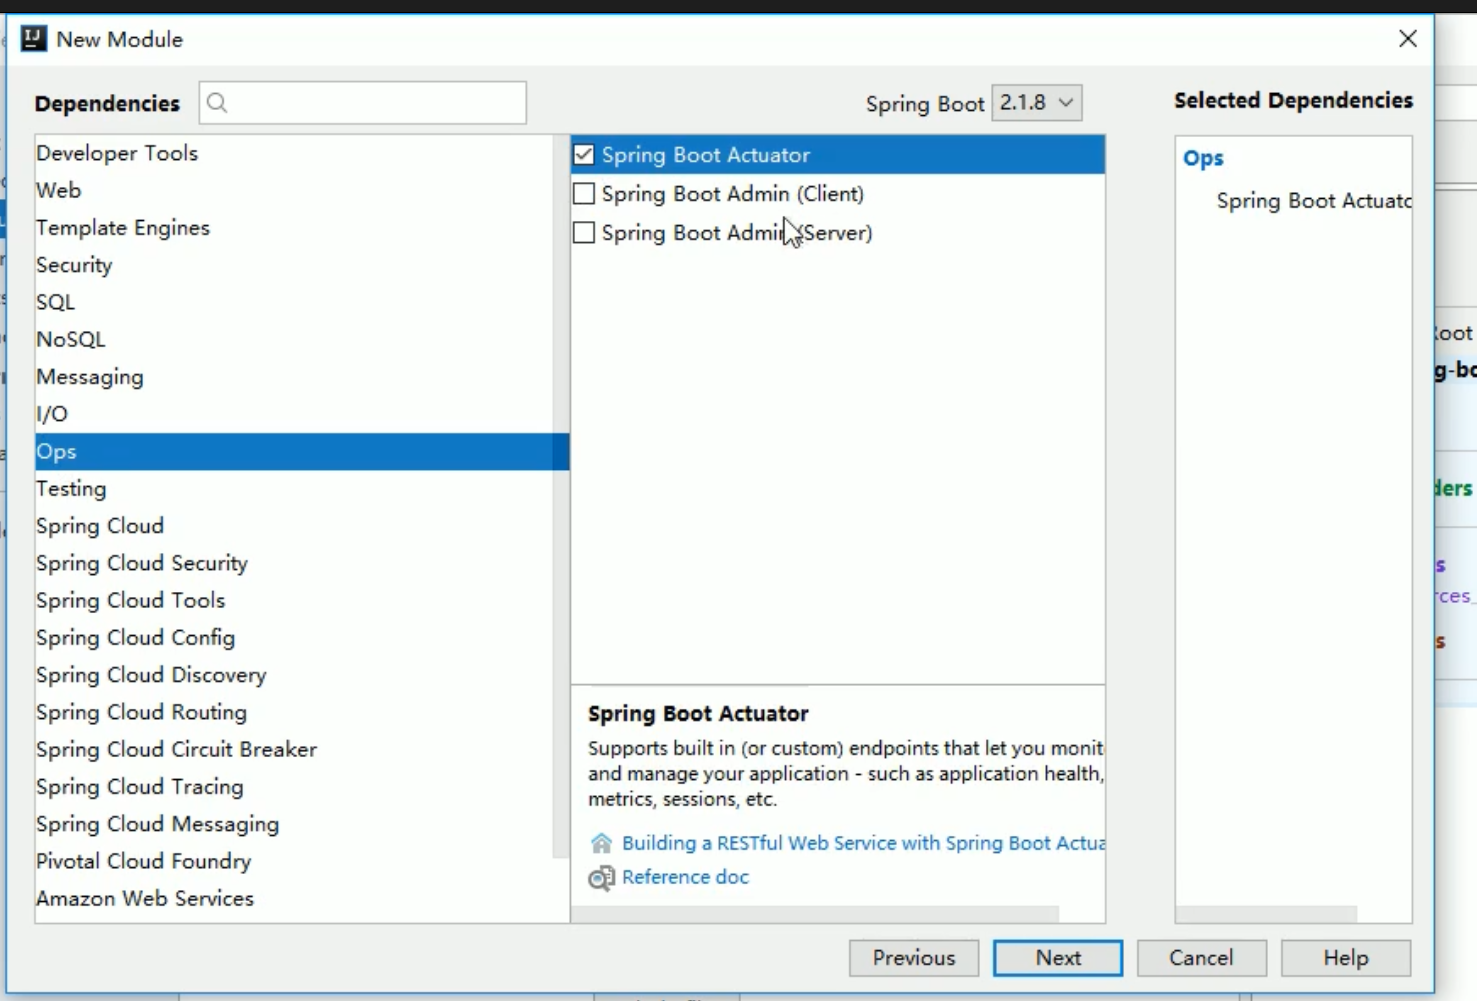
      <dependency>
            <groupId>org.springframework.boot</groupId>
            <artifactId>spring-boot-starter-actuator</artifactId>
        </dependency>
2
3
4
访问 localhost:8080/acruator
- 开启 (health) 健康检查完整信息
management.endpoint.health.show-details=always
- 将所有的监控 endpoint 暴露出来
management.endpoints.web.exposure.include=*
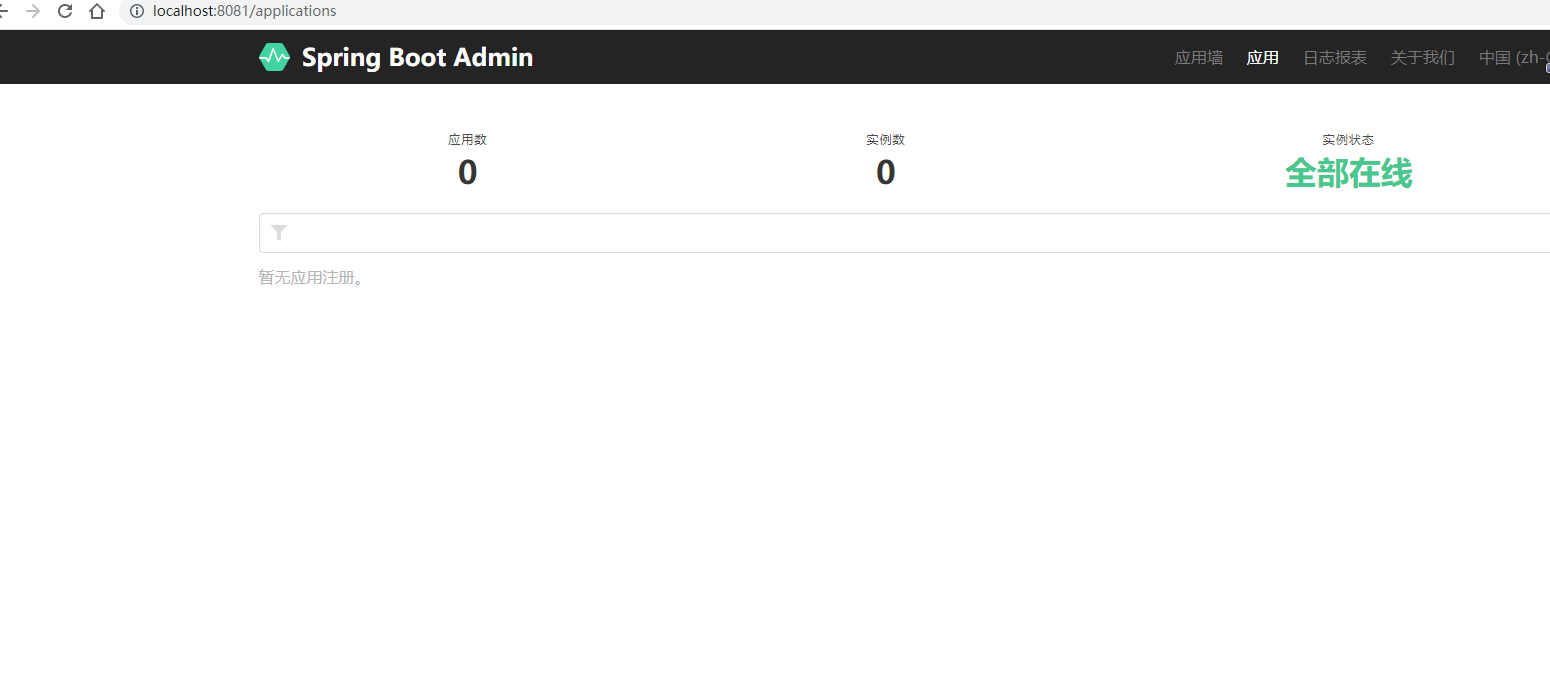
# Spring Boot Admin
Spring Boot Admin 是一个开源社区项目 用于管理和监控 SpringBoot 应用程序
分服务端和客户端 客户端用于查看监控 服务端用于监控 Spring
服务端
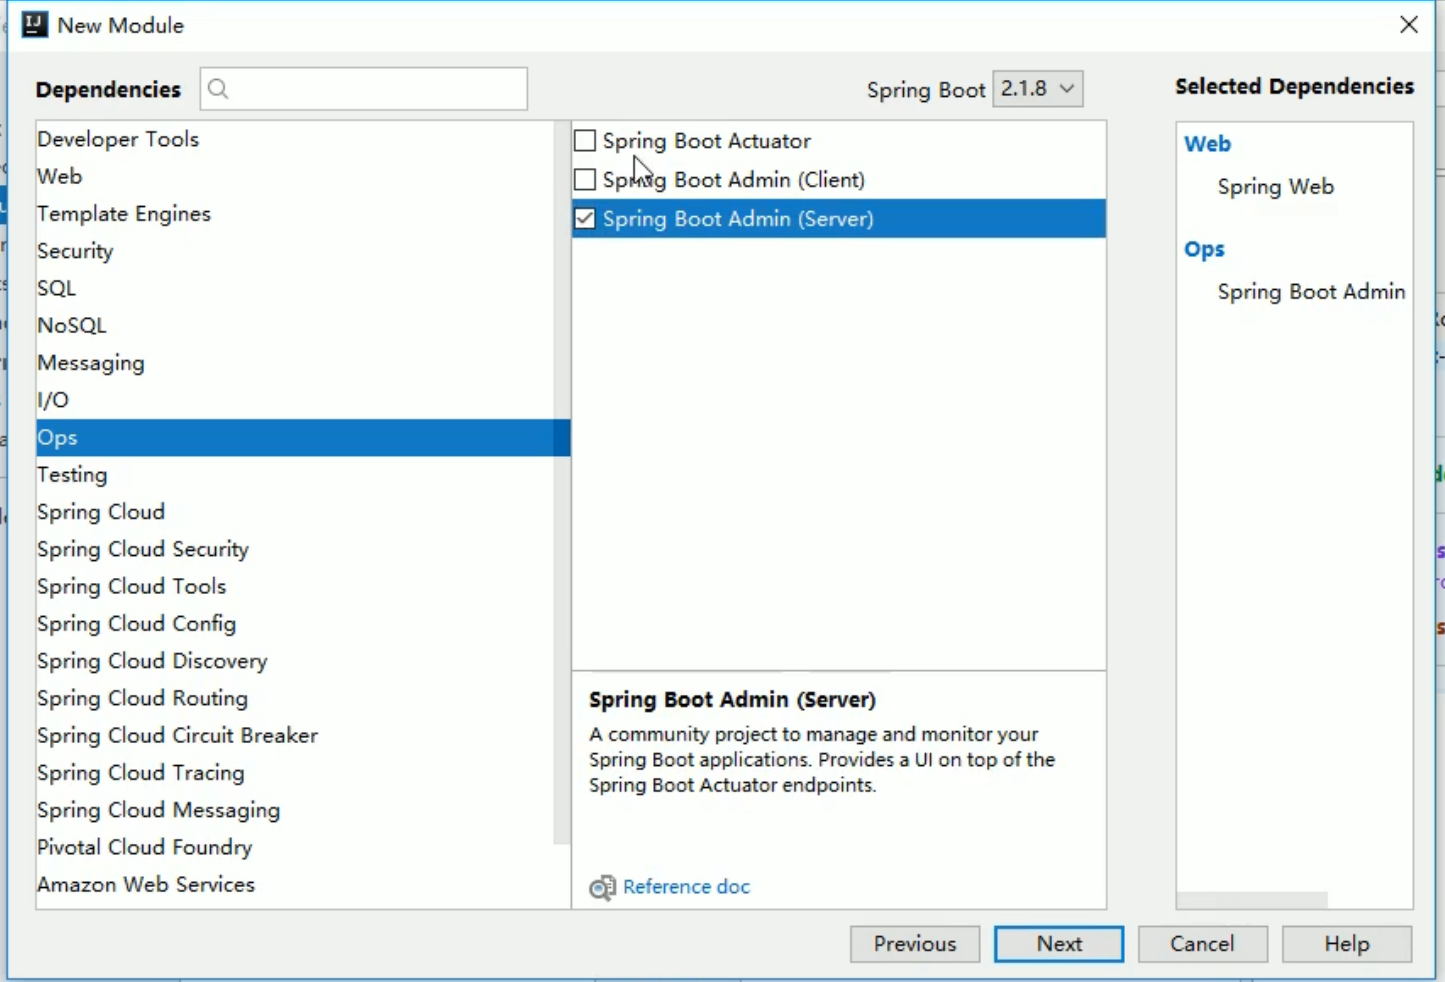
    <dependency>
            <groupId>de.codecentric</groupId>
            <artifactId>spring-boot-admin-starter-server</artifactId>
            <version>2.5.0</version>
        </dependency>
2
3
4
5
在启动类中加上 注解 @EnableAdminServer 用于监控 springboot
客户端
创建另外一个项目
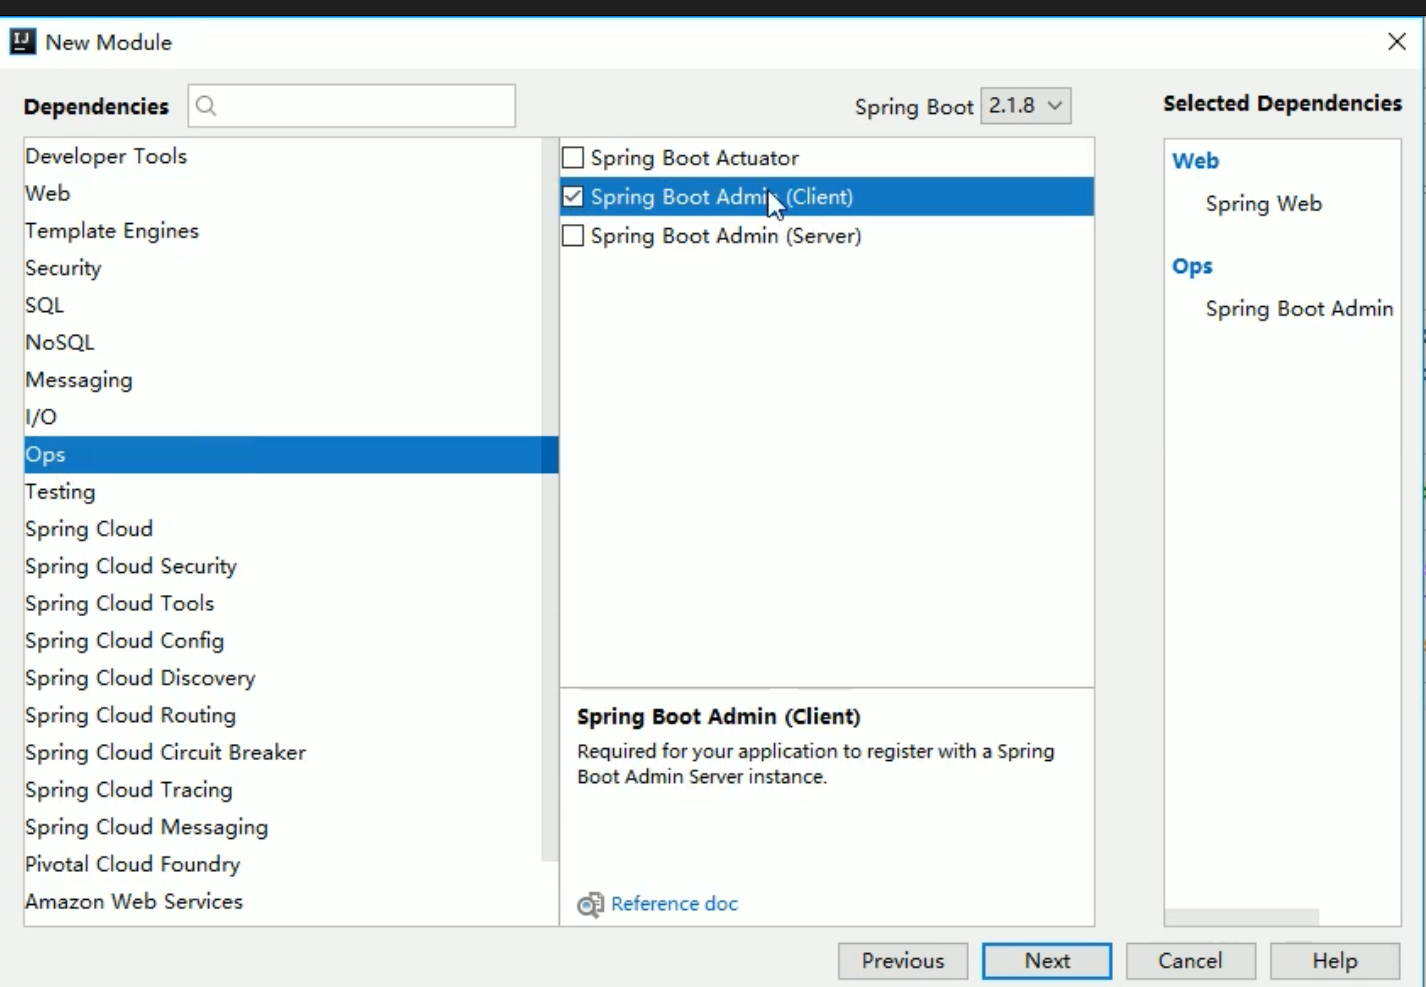
        <dependency>
            <groupId>de.codecentric</groupId>
            <artifactId>spring-boot-admin-starter-client</artifactId>
            <version>2.5.0</version>
        </dependency>
2
3
4
5
在 application 配置 admin.server 地址
spring.boot.admin.client.url=http://localhost:8080  #对应的是server的ip和端口
management.endpoint.health.show-details=always
management.endpoints.web.exposure.include=*
2
3
# 部署
SpringBoot 项目开发完毕后,支持两种方式部署到服务器上
jar 包 (官方推荐)
直接在 maven 中打包即可
war 包 在 pom 文件中 packageing 定义为 war 包 启动类继承 SpringBootServletInitializer 类 重写 configure 方法
@Override
protected SpringApplicationBuilder configure(SpringApplicationBuilder builder) {
    return builder.sources(SpringbootProfilesApplication.class); //将启动类字节码文件传递过去
}
1
2
3
4放置 war 包到 tomcat 的 webapps 的目录下启动 tomcat 即可